
Getting started
Manage runtime configurations
This section describes how to create and manage runtime configurations. The following section describes step by step how to create and activate a new runtime configuration and in a second part how to load and activate an older configuration.
- By default the myarmadmin application provides a
read-only view of runtime configuration data. Therefore to create
or change runtime configurations we need to enter the edit mode by
hitting the "Edit" button of the "Control area":

Figure: The "Edit" button within "Control area" - The "Control area" changes and the "Cancel" and
a text field are displayed. Enter in the text field a name of the
configuration. This name is to identify the configuration and is
presented in the loading configuration dialog later.

Figure: The "Cancel" button and configuration name text field within "Control area" - Add a host where a myarmdaemon
is running and accepts runtime configurations:

Figure: Click "Add" button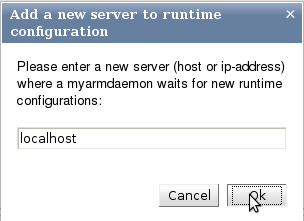
Figure: Enter a host name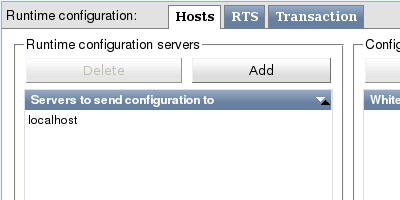
Figure: Host addedFigures: Adding a new host for runtime configuration distribution - Real time statistics are always arranged in groups. Therefore
we need to enter a group name to associate real time statistics as
depicted in Figure
"Entering a RTS group name".
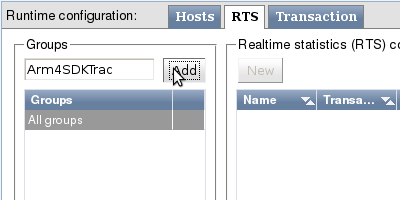
Figure: Entering a RTS group name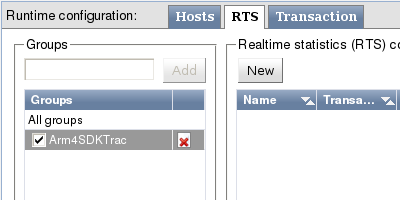
Figure: RTS group "Arm4SDKTrac" addedFigures: Adding a real time statistics groupIn Figure "RTS group "Arm4SDKTrac" added" the group is added to the list of RTS groups and automatically selected. Now the "New" is enabled within the real time definition view. Clicking this button will open the following dialog to enter a new real time statistic definition.
- The RTS definition dialog is used to create a new definition or
to change an existing one. Here we create a new RTS definition. To
do so we need first to select the application name for which an
real time statistic should be generated:

Figure: Selecting the application for a RTS definitionIn our case we select the application "httpd" for the Apache-HTTPD-Server. In brackets the associated identity properties of the ARM application definition is shown.
- Next we select the appropriate transaction definition name here
"HTTP":

Figure: Selecting the transaction "HTTP" for a RTS definitionIn brackets the associated identity properties and context property names of the ARM transaction definition is shown.
If the "Drop" check box is checked only RTS data is calculated and any single transaction measurement is dropped. If you have measurements with high frequency you can get the RTS statistic without storing any single measurement. This saves a lot of disk space.
- After selecting the application and transaction definition
names we need to enter a name for our new RTS definition:

Figure: The name and URI filter of the RTS definitionThe real time statistic is named "TracWiki" and it generates statistics for "HTTP" measurements with an URI containing "/wiki" string. With these settings the real time statistic is calculated for each request to a Trac wiki page.
Note that now all needed data is entered the "Ok" button is enabled thus it is possible to apply our inputs.
- However there are some more data we can define for the RTS
definition:

Figure: RTS definition interval and thresholds- the aggregation interval in minutes for the real time statistic to "15 minutes"
- the threshold unit from a drop-down-box selecting
- "n ms"
- milliseconds
- "n.nn ms"
- milliseconds with fraction
- "n s"
- seconds
- "n.nn s"
- seconds with fraction
- three thresholds (by selecting from a drop-down-box) to define
response time constraints to estimate the response time in four
categories:
- below threshold 1 is a expected response time (good)
- below threshold 2 is a tolerated response time (tolerated) (by a factor of 2 from the first threshold)
- below threshold 3 is a bad response time (bad) (by a factor of 4 from the first threshold)
- above threshold 3 is a frustrating response time (not wanted)
- Entering a monitor condition and a notify action is described in detail in section "Real time statistic configuration"
Given all this data we can click the "Ok" button and the RTS definition is created.
- We created a new real time statistic definition called
"TracWiki". The next step is to store the complete new
runtime configuration into the database. This can be achieved by
clicking on the "Save" button within the "Control
area":

Figure: Save complete runtime configuration (Click to enlarge) - After clicking the "Save" button the configuration is
stored with a new version number into the database:

Figure: Newly created RTS definition stored in database (Click to enlarge)As depicted in Figure "Newly created RTS definition". The created RTS definition is stored in the database with the configuration name "myarm-info" at revision number "1" and created by user "demo".
- To activate the newly created runtime configuration we need to
inform any configured myarmdaemon
process about the new runtime configuration. This can be done by
clicking the "Activate" button in the "Control
area". This will bring up an activation dialog which allows to
select the configured hosts where myarmdaemon processes are running:

Figure: Runtime configuration activation dialogAs shown three hosts are configured to accept runtime configurations, here "localhost", "myarm.local" and "myarm.com". The check boxes before each host name can be used to exclude a host from the current activation. It is also possible to check the runtime configuration version at the appropriate hosts by just clicking the "Check version" button:

Figure: Runtime configuration activation dialog versions checked at "myarm.local" and "myarm.com"Since at "myarm.com" no myarmdaemon is running an error is returned. At "myarm.local" the myarmdaemon is running but has no configuration (version zero). Now to activate the runtime configuration at "myarm.local" just click the "Activate" button:

Figure: Runtime configuration activation dialog resultAfter clicking the "Activate" button and few moments later the activation results are displayed in the dialog:
- "localhost" was not used
- The myarmdaemon running on "myarm.local" successfully received and activated the new runtime configuration.
- "myarm.com" was not used since the "Check version" operation failed